Advantco SFDC Adapter:Outbound & Inbound Scenarios
Introduction: In this document, we will discuss about basic integration designs for outbound and inbound directions for SFDC using Advantco Adapter in SCPI. As a prerequisite, we need to set up the Advantco SFDC workbench for schema generation.
Assumptions:
- Advantco Adapter installed in SCPI
- Advantco SFDC workbench installed in Eclipse
- Authorization details along with token of SFDC available in security material of CPI for configuration.
You can follow the installation steps in this link Advantco SFDC: Adapter, Workbench Installation
Basis Configurations:
Basis team should install SFDC Advantco Adapter in CPI system. All the installation steps will be available in the documentation in ZIP file downloaded.
Outbound Integration Flow:
- Create a new package in CPI, if any relevant package is available create a new Integration flow
- Provide the name, sender and receiver system details according to naming conventions.
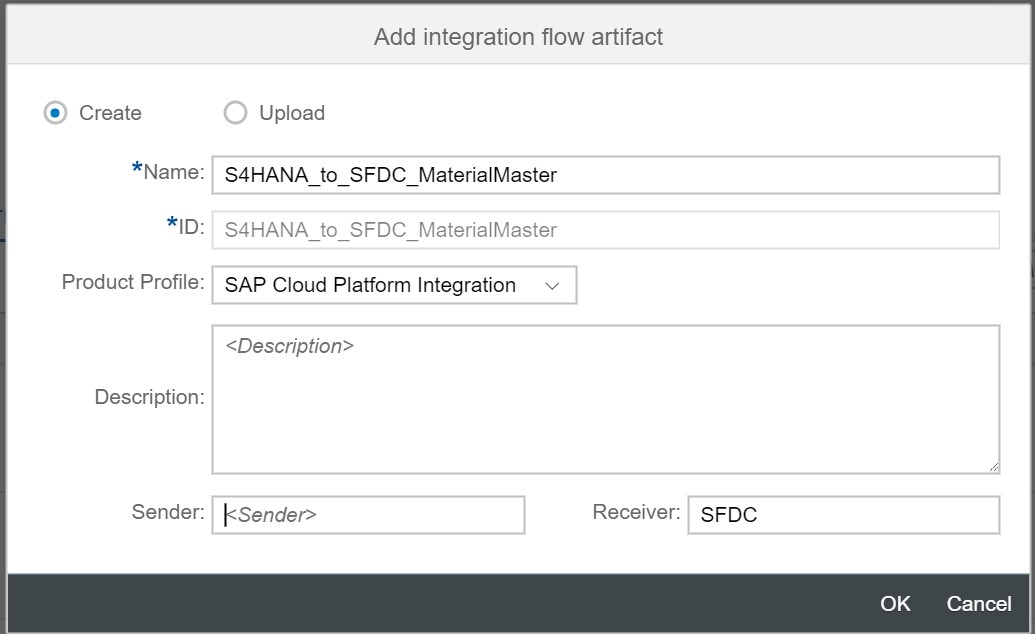
- For this test scenario, we are triggering the content of XML from content modifier and update the records in SFDC.
- For Message mapping, generate schema from Advantco SFDC workbench by following below steps.
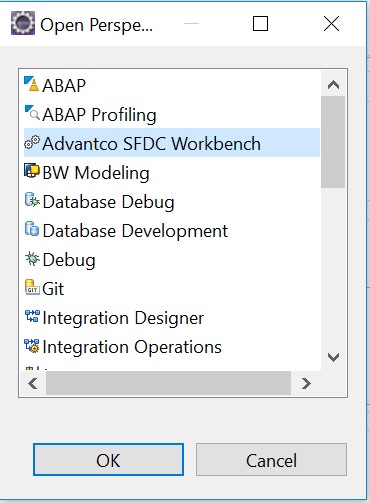
- Go to Eclipse and click on perspective and select Advantco SFDC Workbench as below.
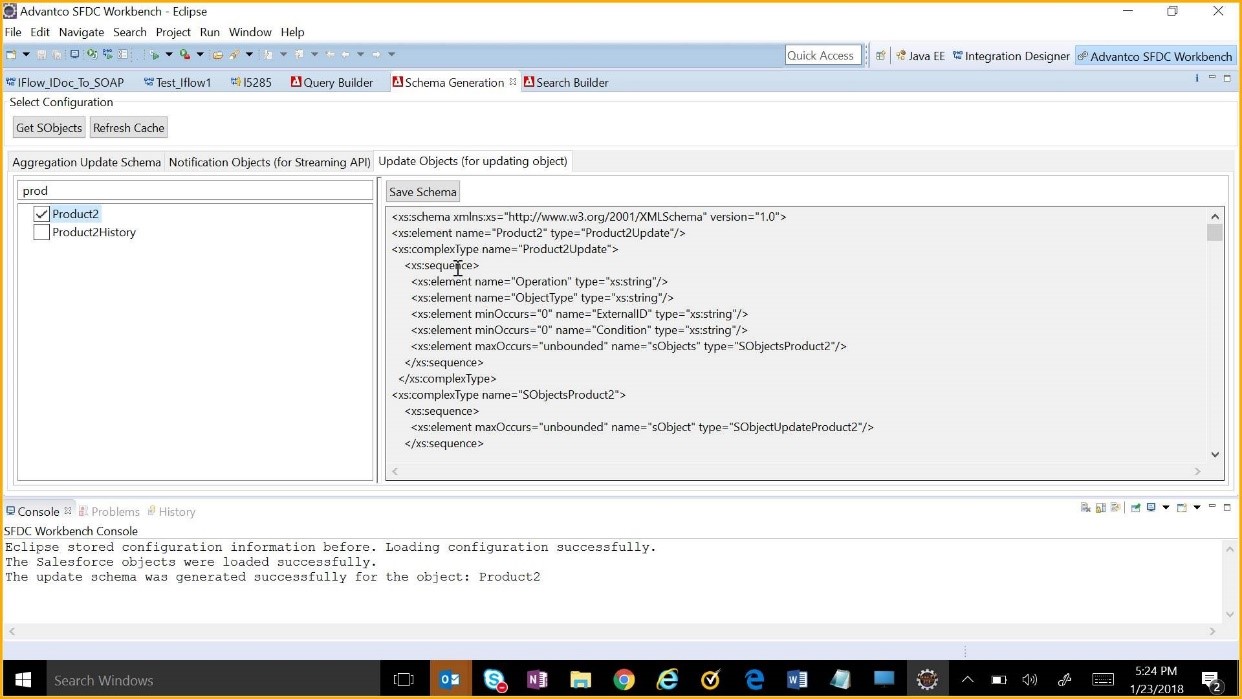
- Now click on Schema Generation->Update Objects (for updating object) and search for product2 Click on the checkbox beside and the schema starts loading. Once it is done, click on save schema button.
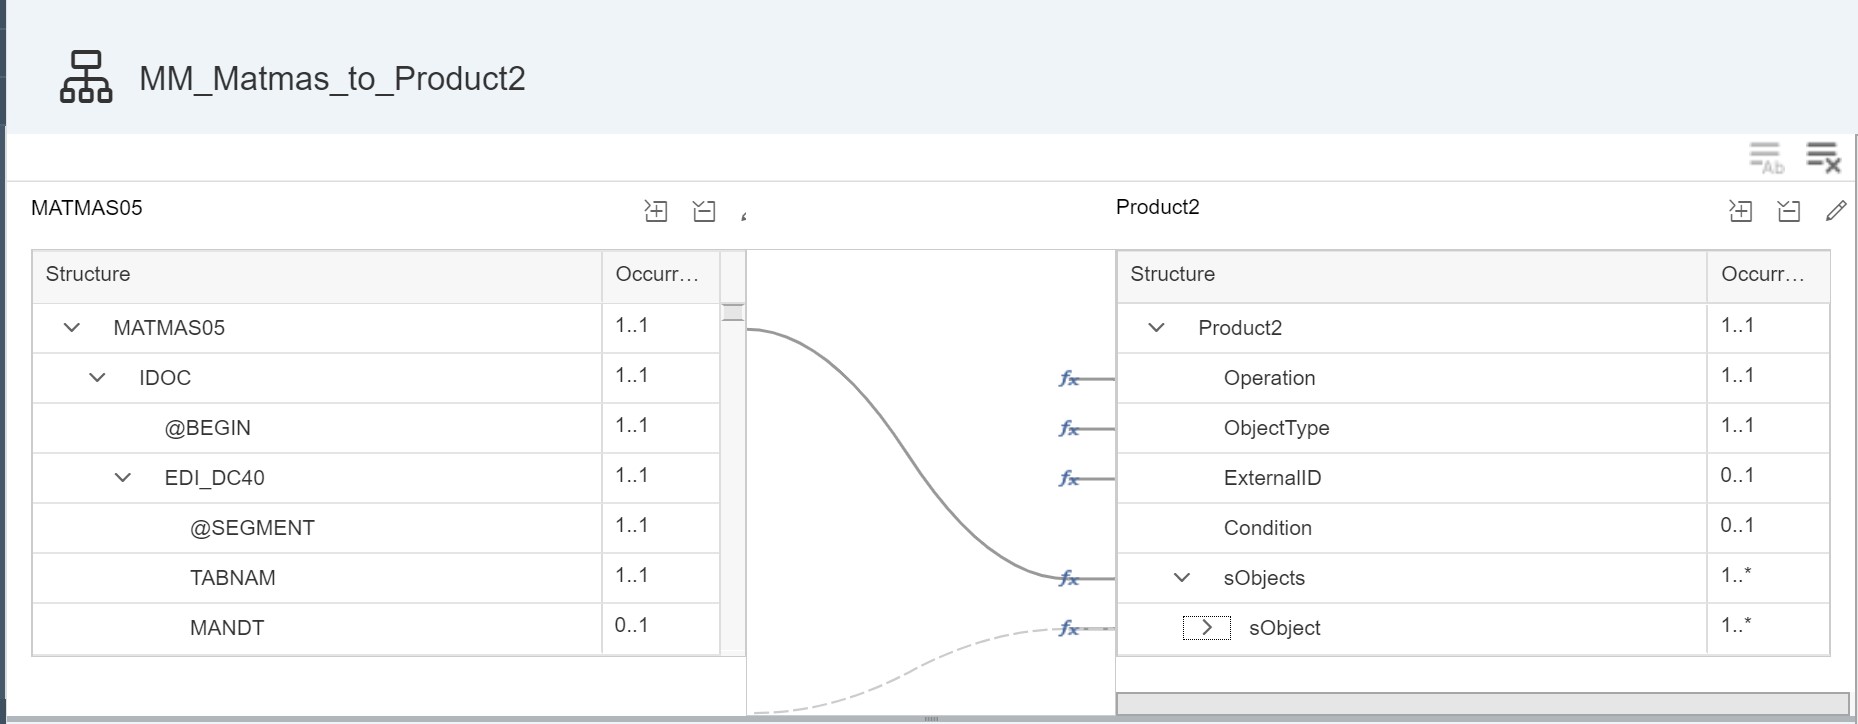
- Similarly get the XSD for MATMAS IDOC from S/4Hana and now import the MATMAS XSD as source structure and the Product2 XSD as target schema.
- The following fields in the target structure should be assigned constant as below.
- Operation: Name of operation to be performed on SFDC table (insert, update, upsert)
- Operation: Name of operation to be performed on SFDC table (insert, update, upsert)
- ExternalID: The key field of the SFDC table.
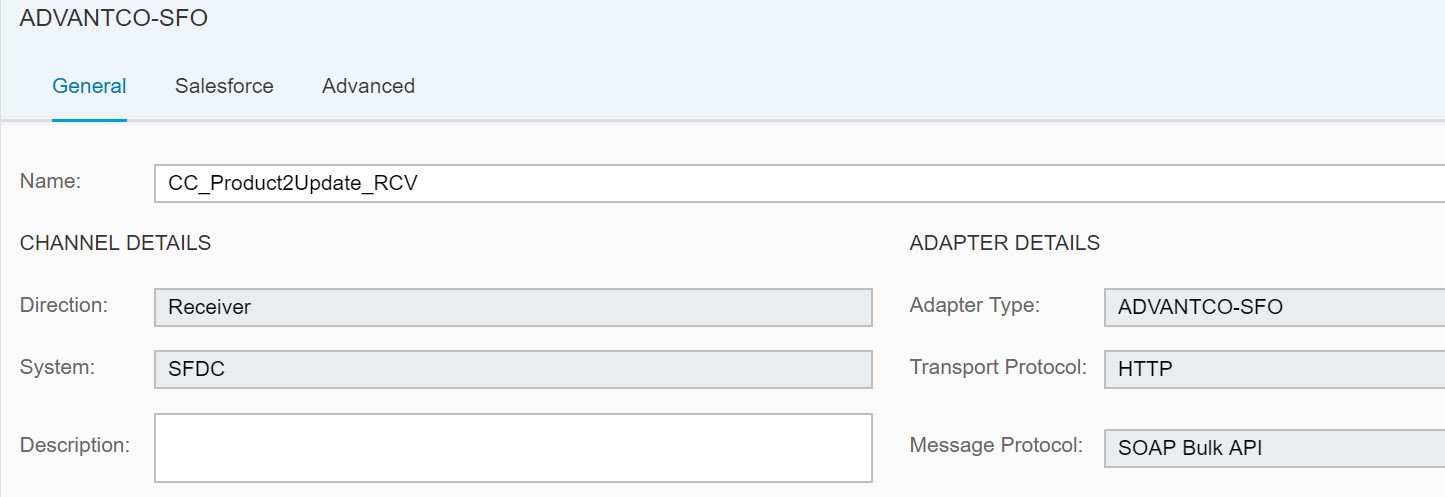
- Configure the SFDC Receiver communication channel name as below snapshot.
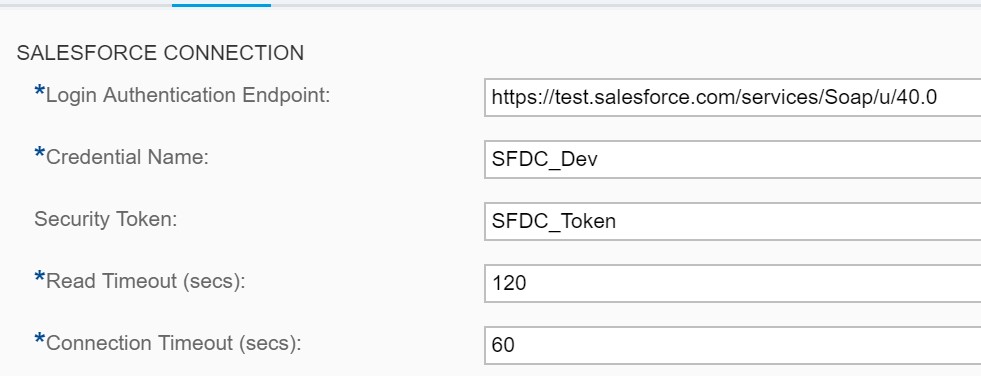
- Provide the credential name and security token in the communication channel and in content handling, set content type as in XML Format.

- Once all the configurations are completed, below flow can be saved and deployed for testing the scenario.

- Finally, once the flow is deployed successfully, we can see the integration flow is started successfully and a message triggered to SFDC.
Inbound Integration Flow:
For the inbound integration flow, the receiver connectivity to IDOC is a known solution. So, we cover only sender channel part by the content fetched from SFDC and writing it in datastore of SCPI.
- Creating of integration flow is like above discussed, once we created configure the sender channel with SFDC Advantco adapter.
- The Authorization and token details are same previously used and must configure here.
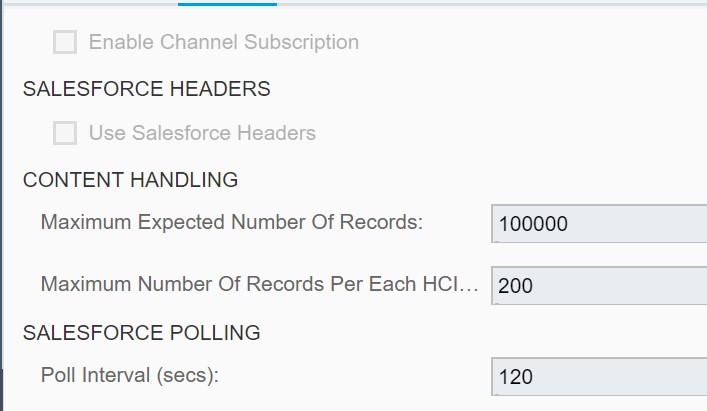
- Set the polling interval and maximum number of records for each CPI message as per requirement. Below are the default values.
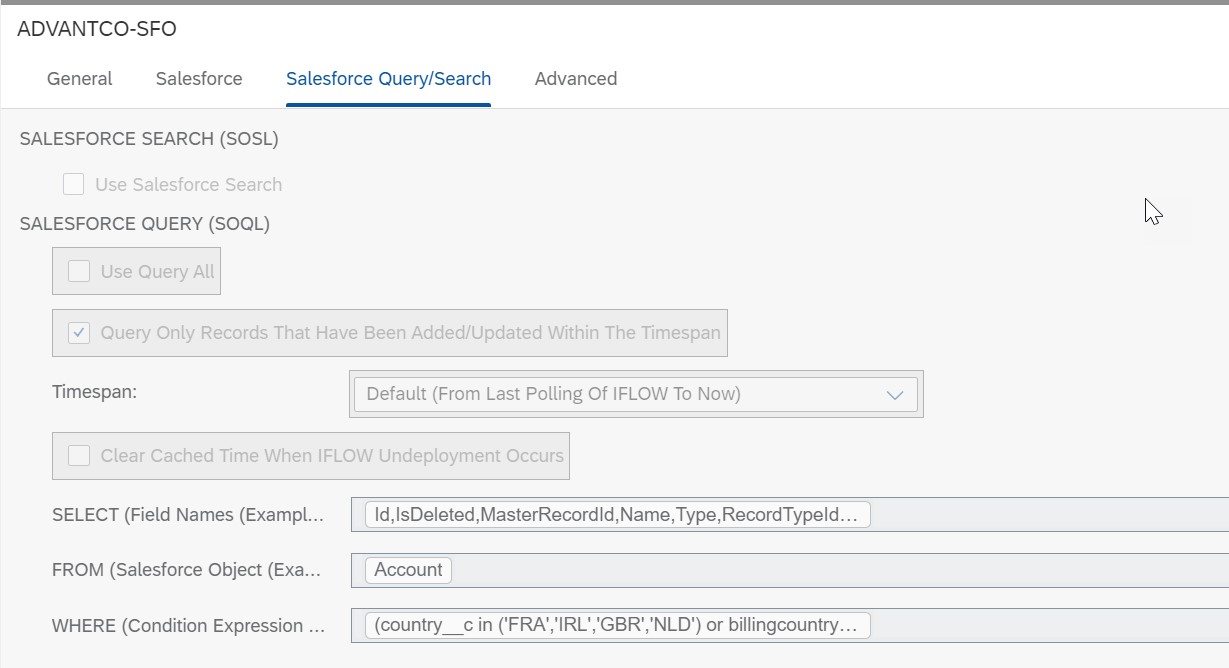
- In the Salesforce Query/Search, Fill the fields as below
- SELECT: Fields which require to map the target structure
- From: Table name from which the data to be fetched
- Where: Any conditions to set for fetching the data.
- Update the data store configurations with name, retention period and expiry. Use defaults values here for testing.
- Once the configurations are completed, below integration flow can be saved and deployed.
Finally, once deployed the integration flow will be started state and the message would be triggered and can be seen in Message monitor. The data can be seen in data store which would be created once the iflow deployed.
XSD for inbound scenarios:
XSD for inbound scenarios can get from Query Builder of the workbench perspective as below.
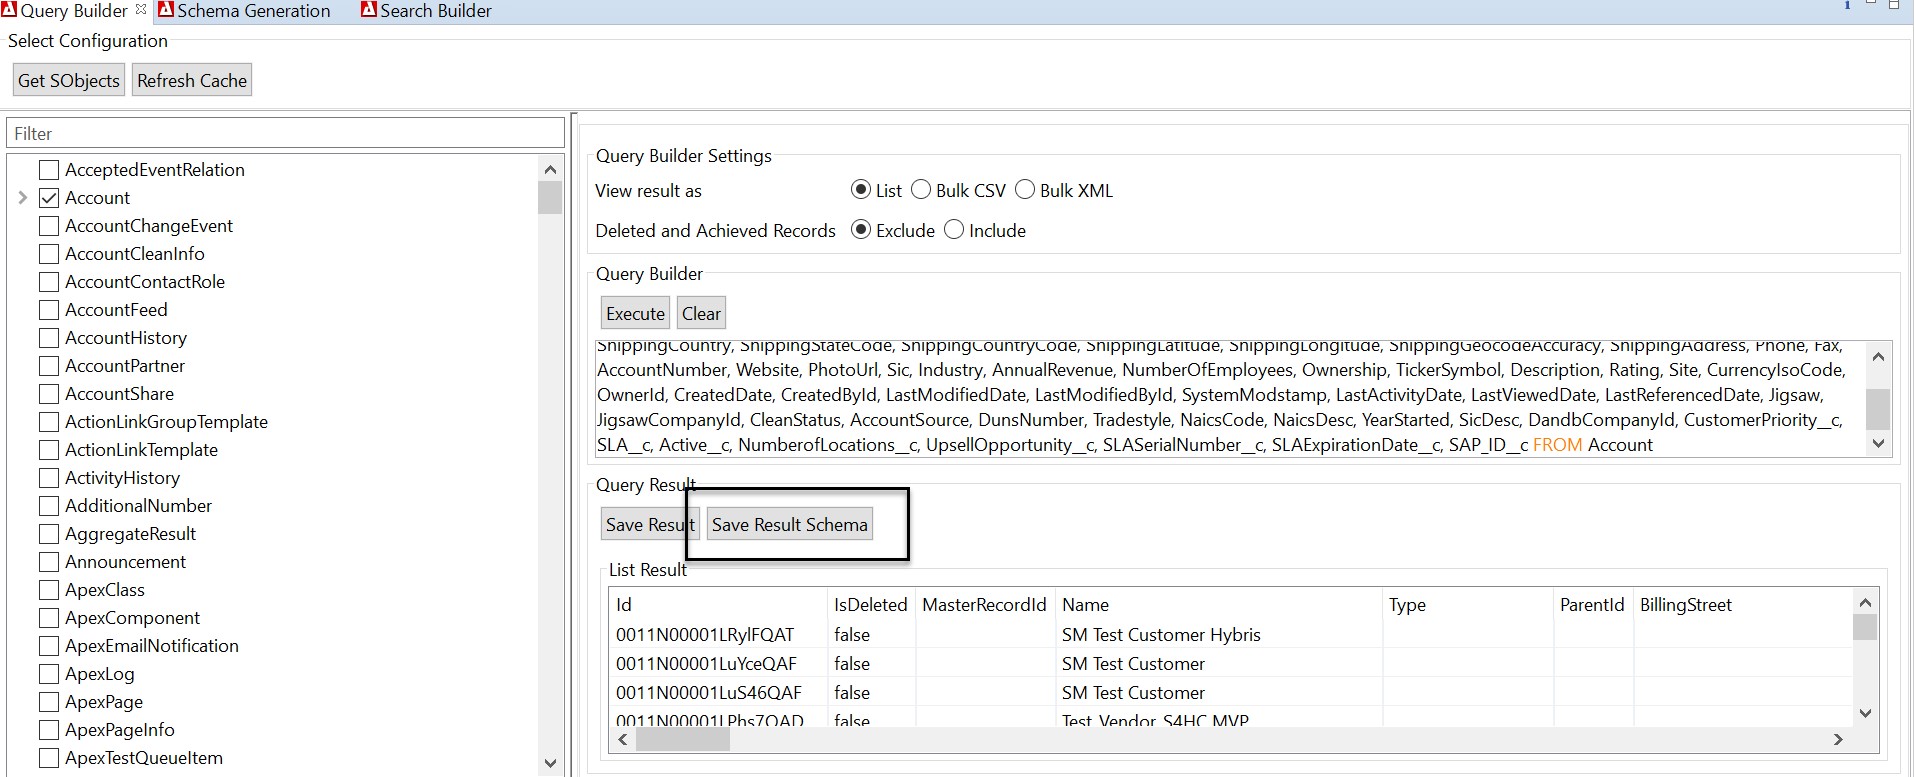
Fields with no values may not capture in the XSD schema. This may need to add manually. Various kinds of output formats are available like List, CSV and Bulk XML for the content to be saved locally.
The integration experience with this adapter is easy to gain, maintain with reducing complexity. Happy Learning!
.png?width=900&height=186&name=Advantco%20logo%20AAC%20V1%20Ai%20file%201%20(1).png)
.png)
.png)


